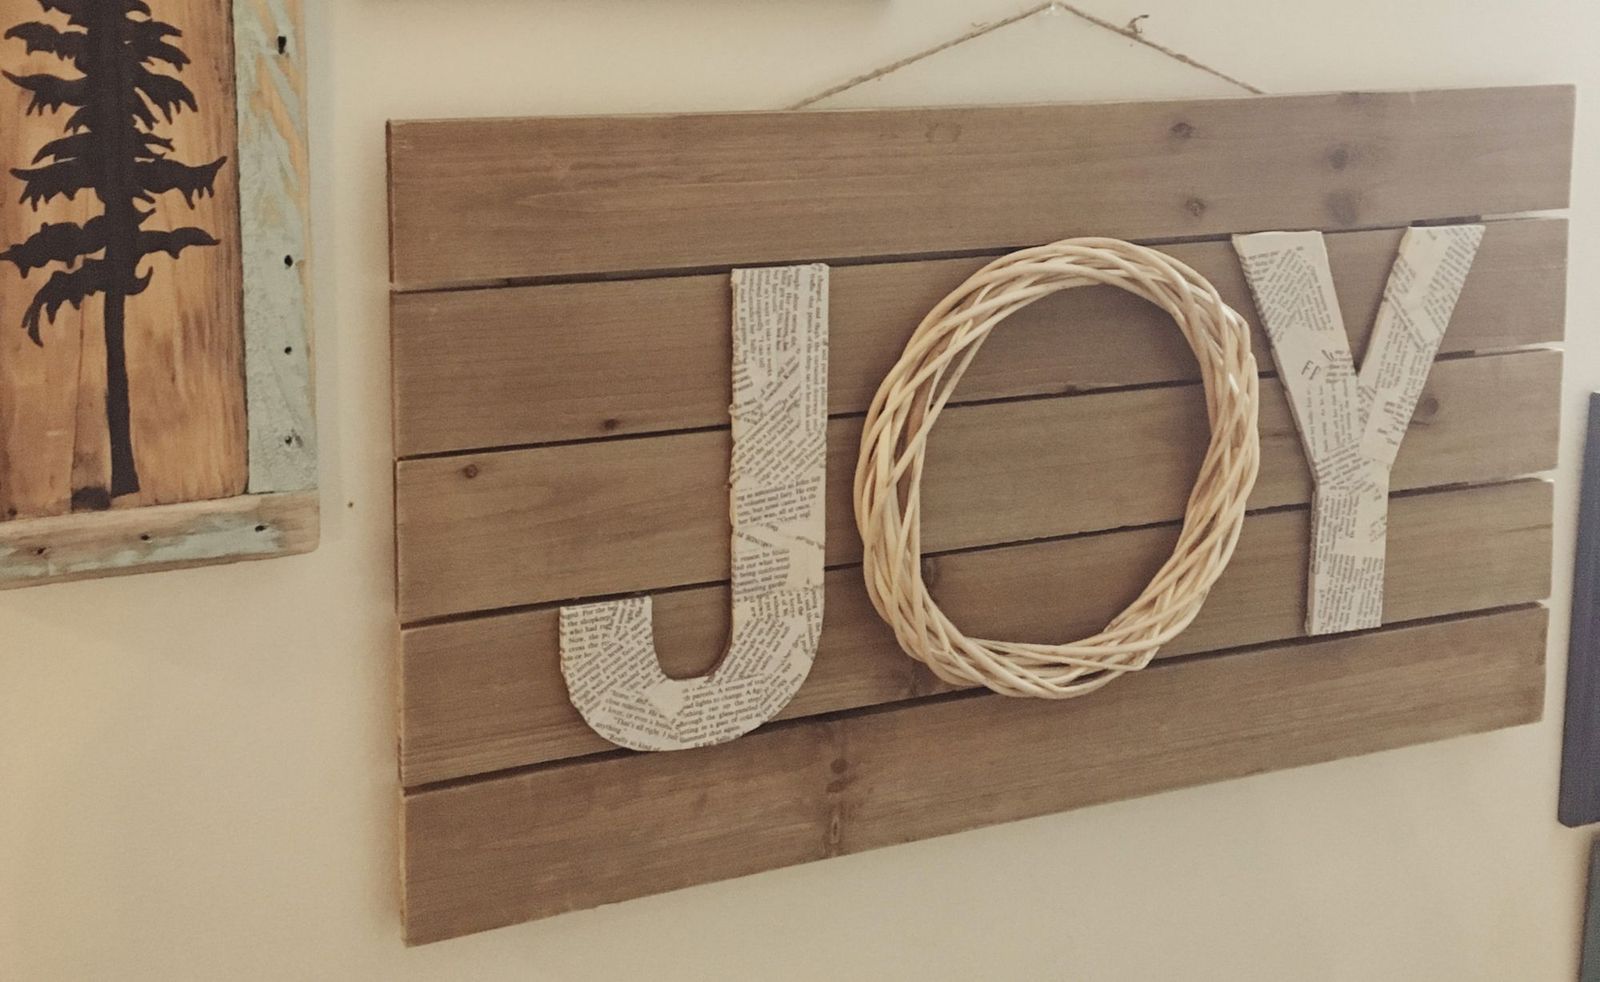
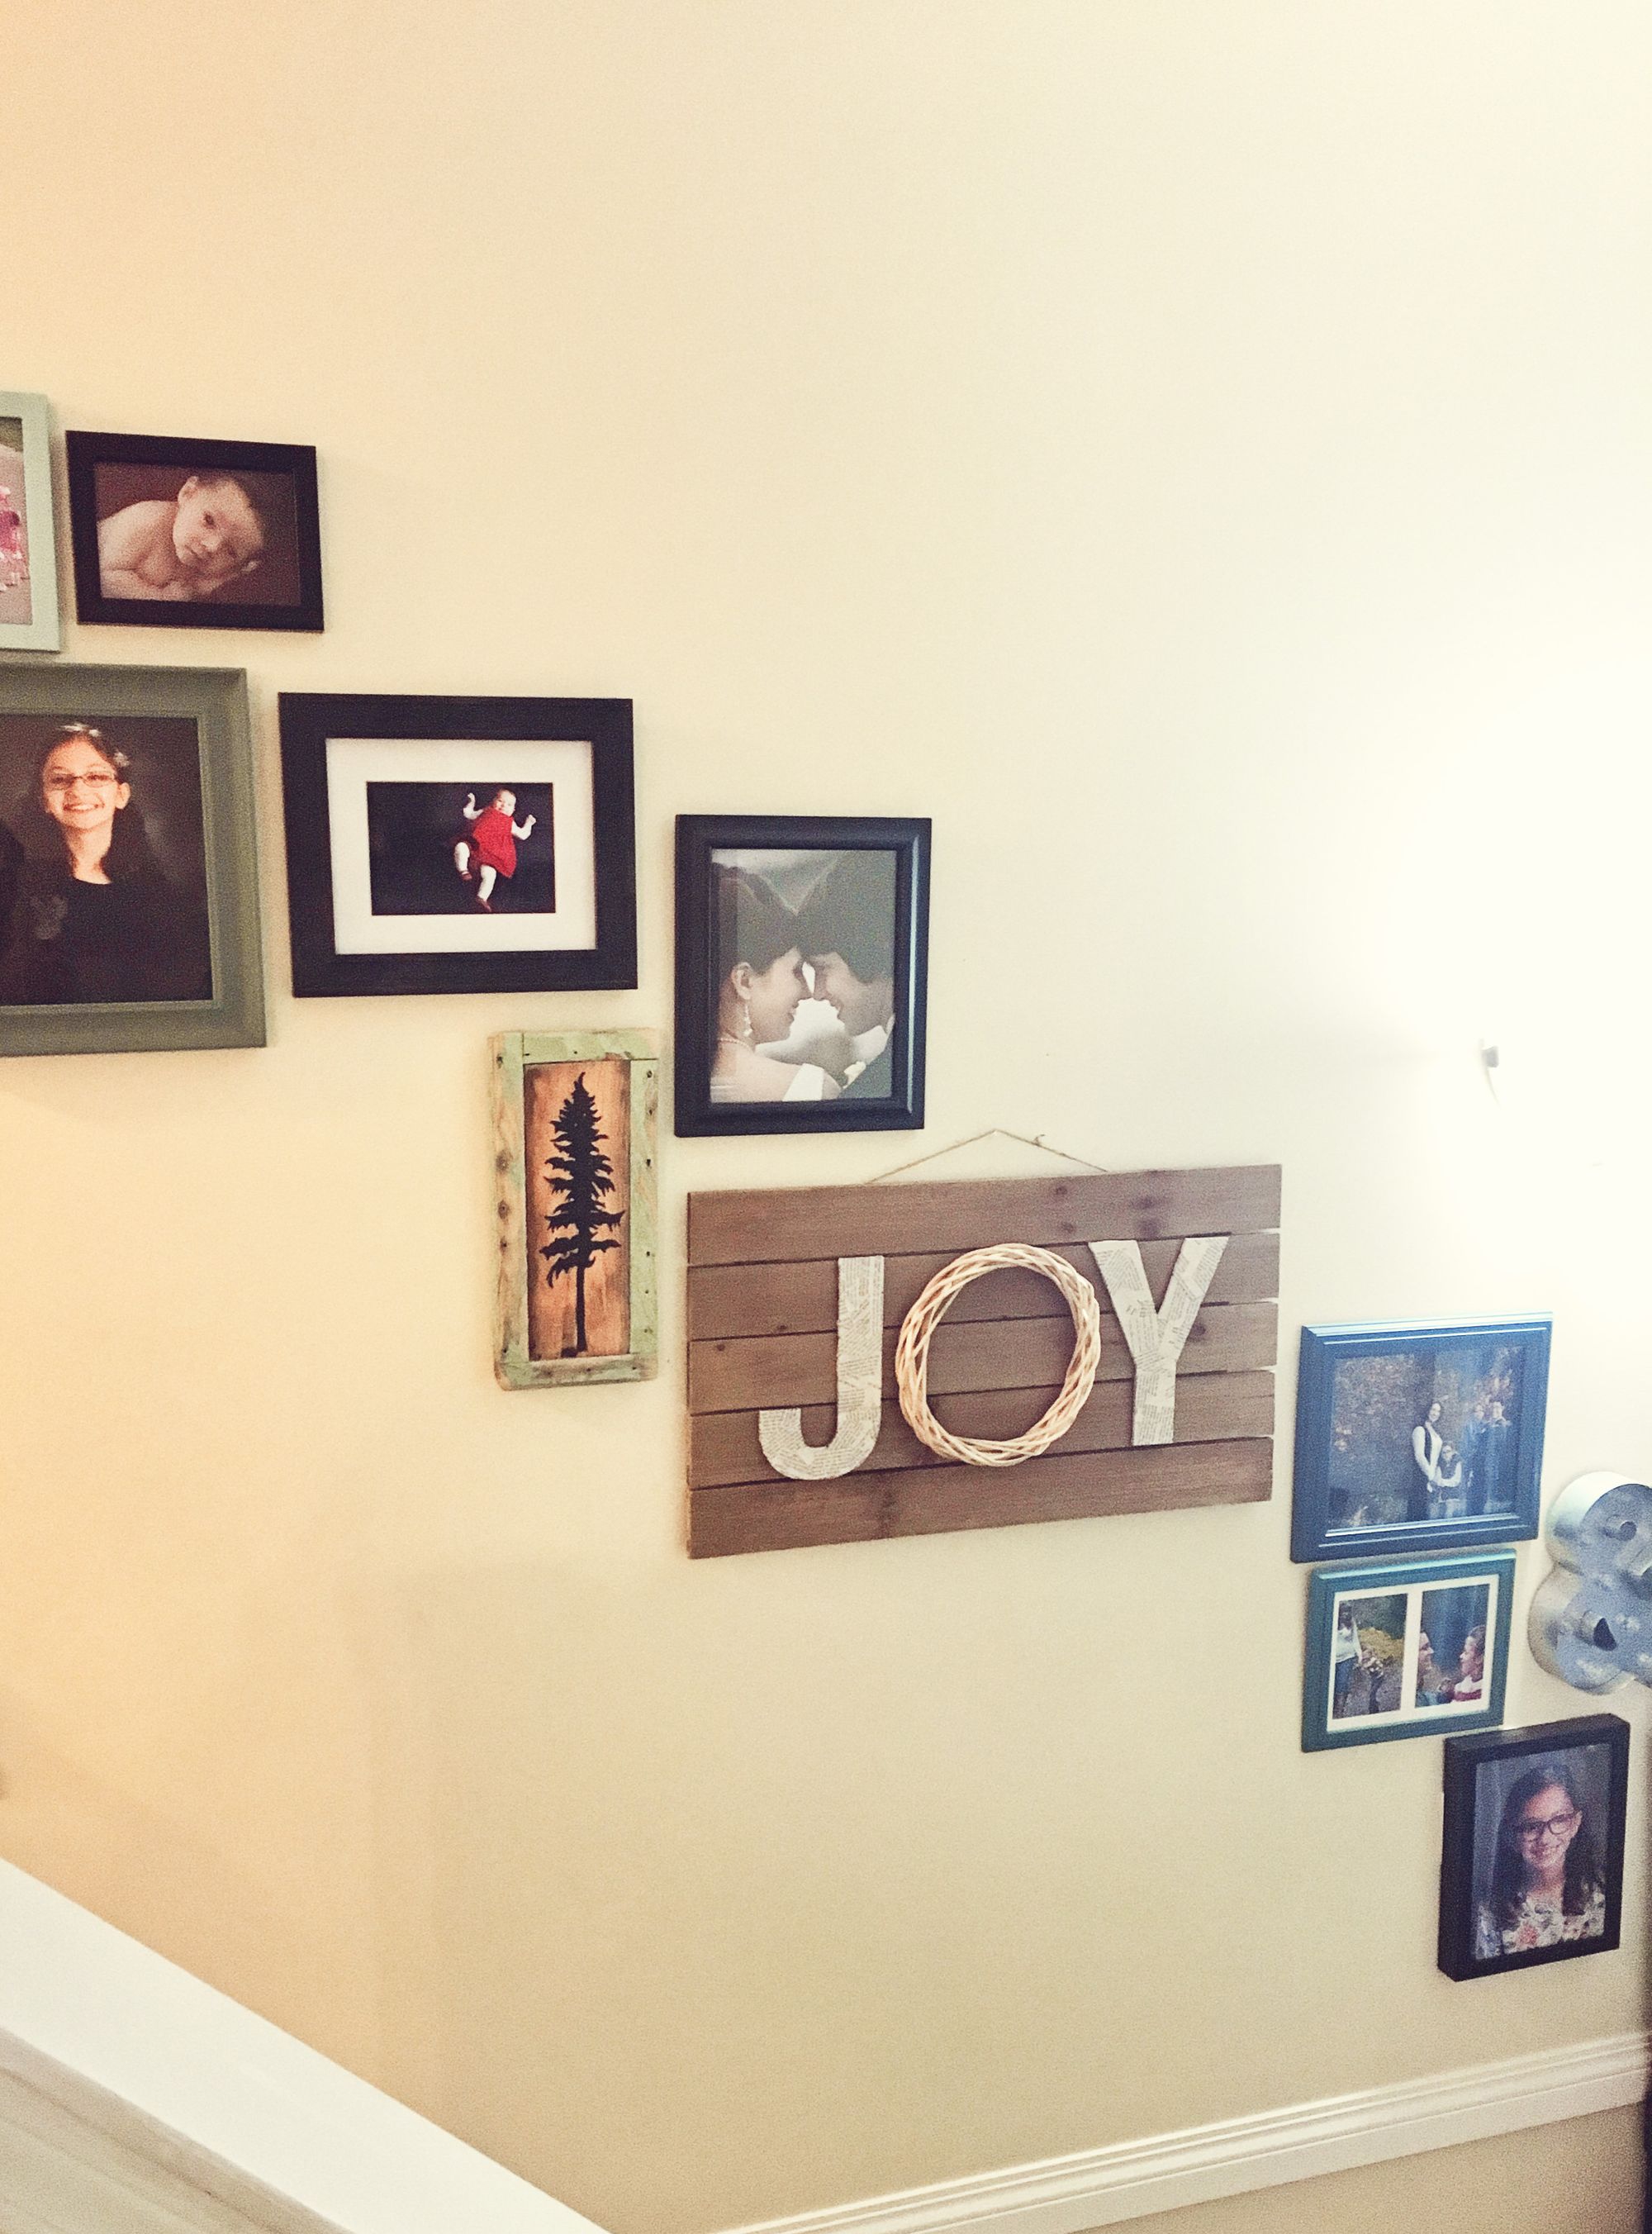
Christmas.
It's been my favourite time of year, as long as I can remember. And no matter my season of life thus far, it always makes me as giddy as a child! The past few years have been harder to be joyful in amidst the busy chaos. But with a new grasp on my life- This year I am bringing the JOY!
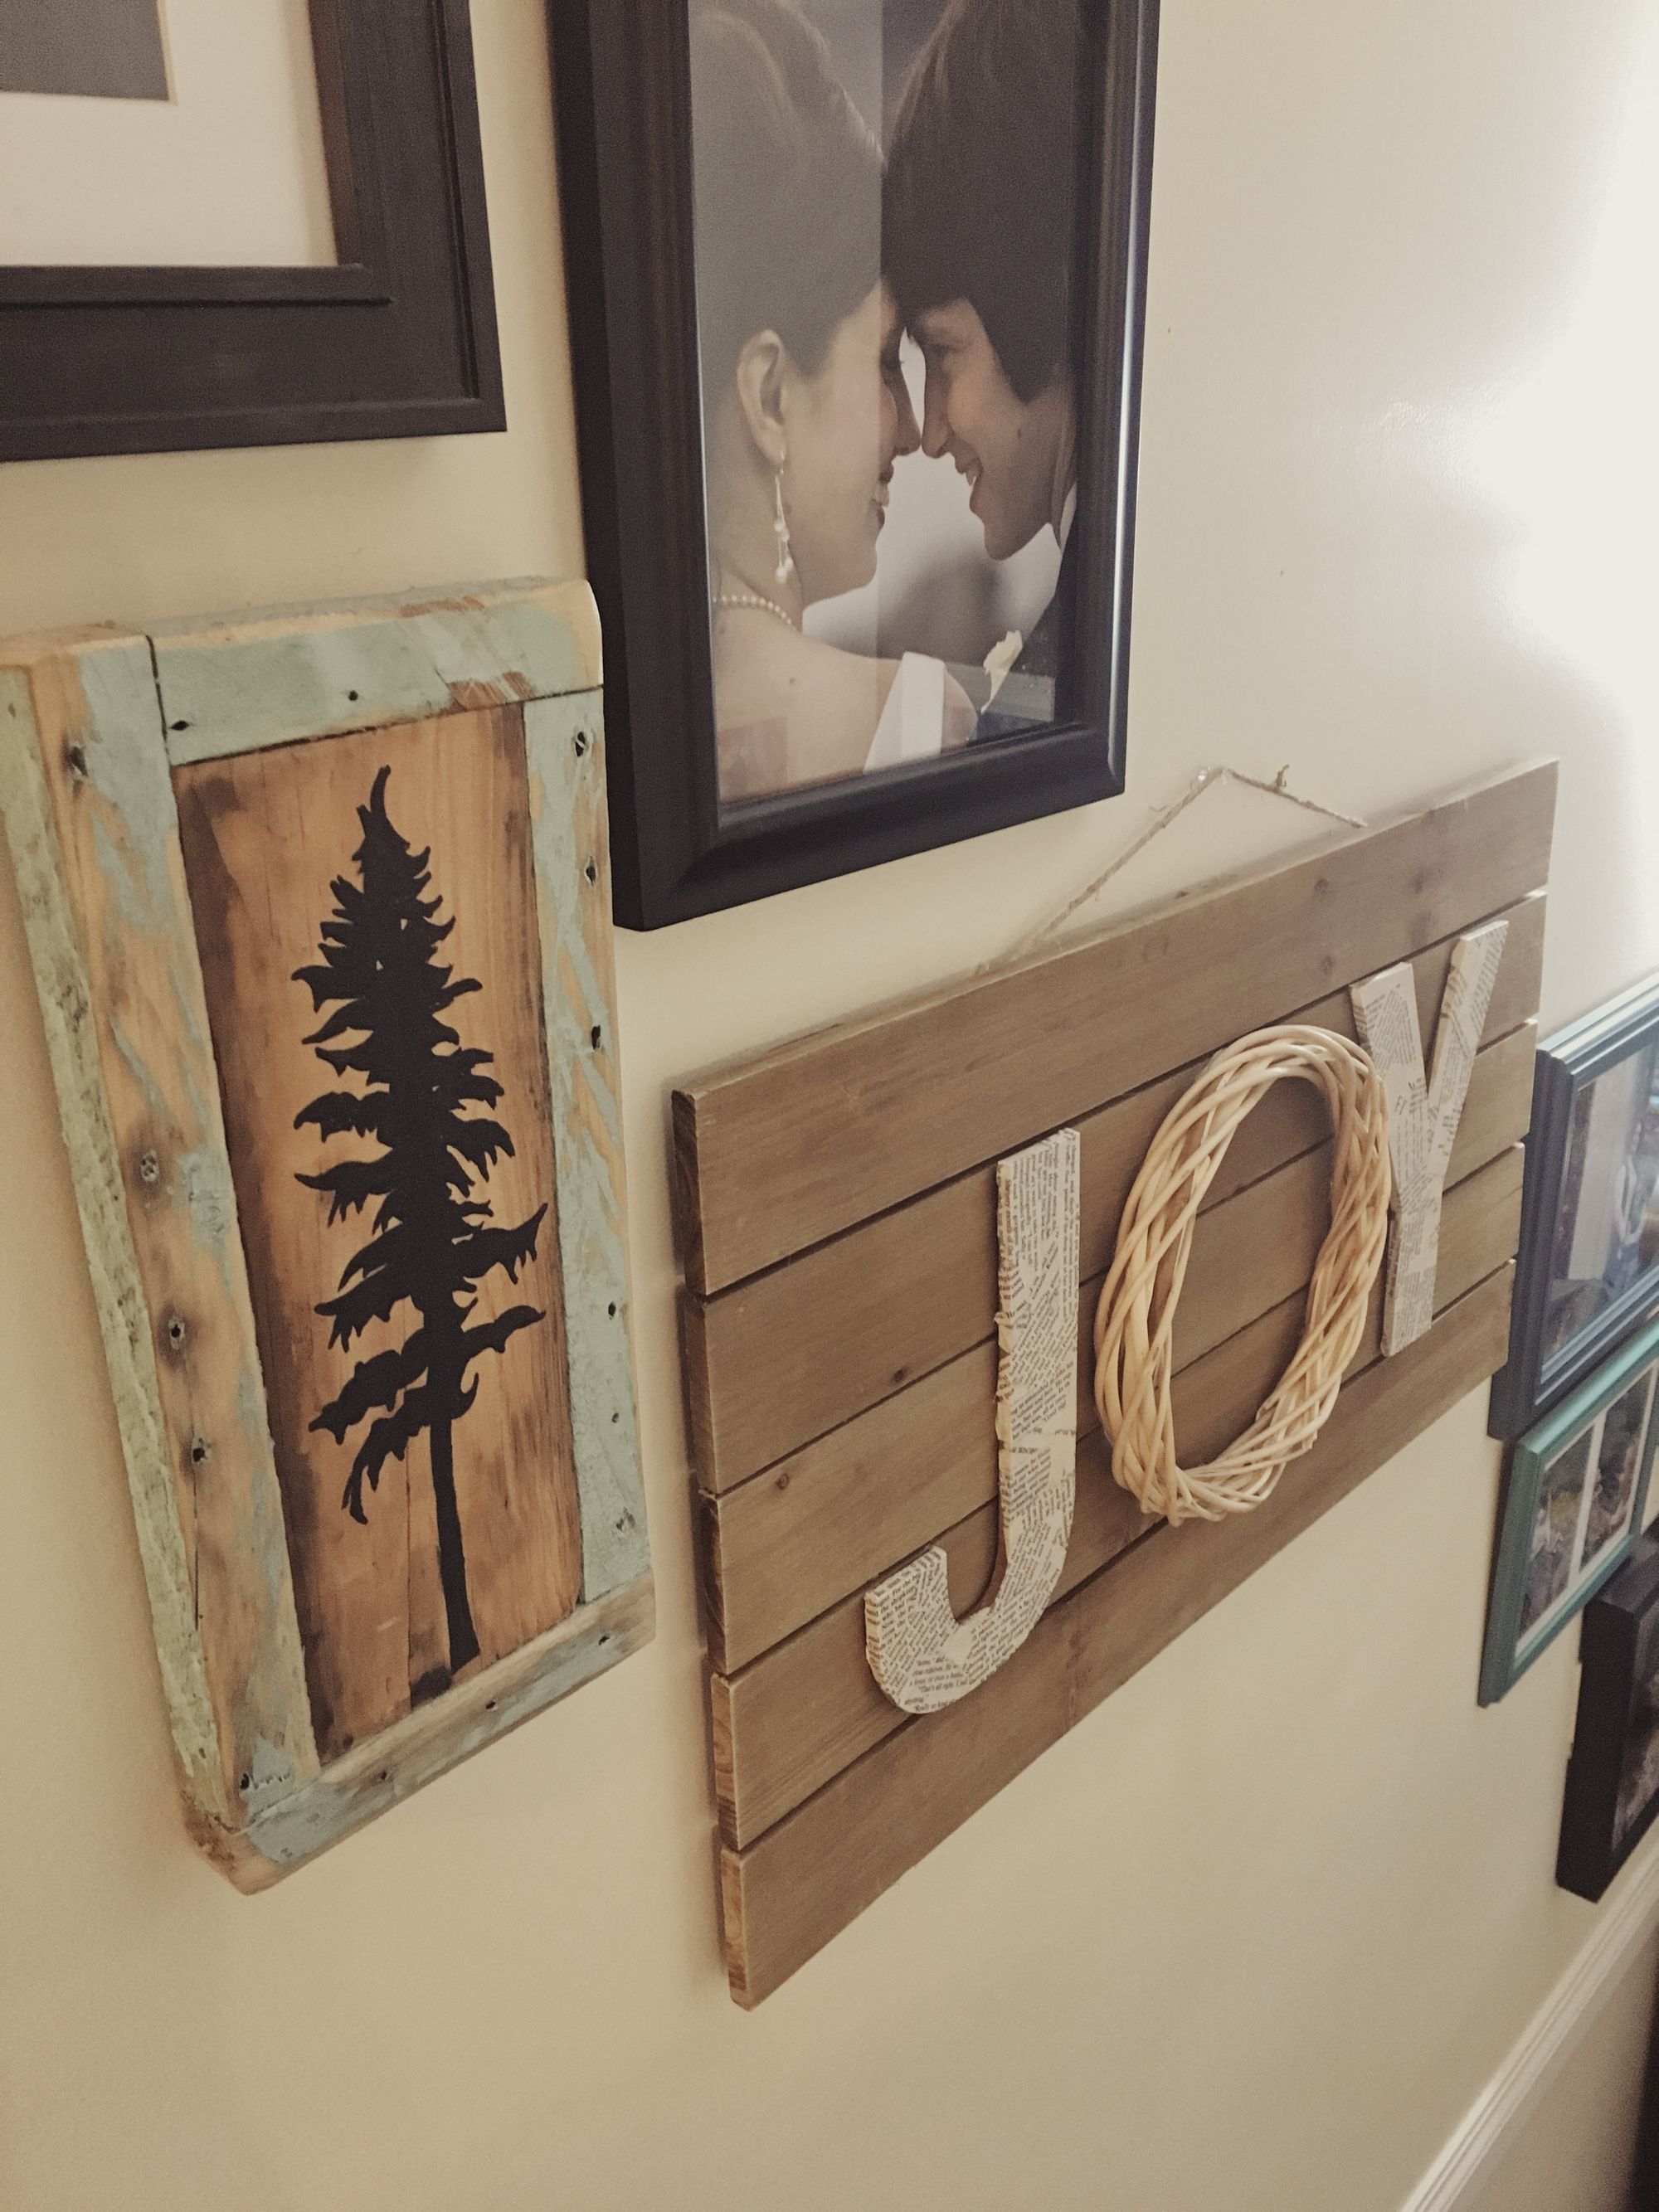
So this craft seemed so appropriate! And the idea came to me from a bit of a mash of other things I'd seen. And in the end was quite inexpensive to execute! SO happy with how it's turned out!
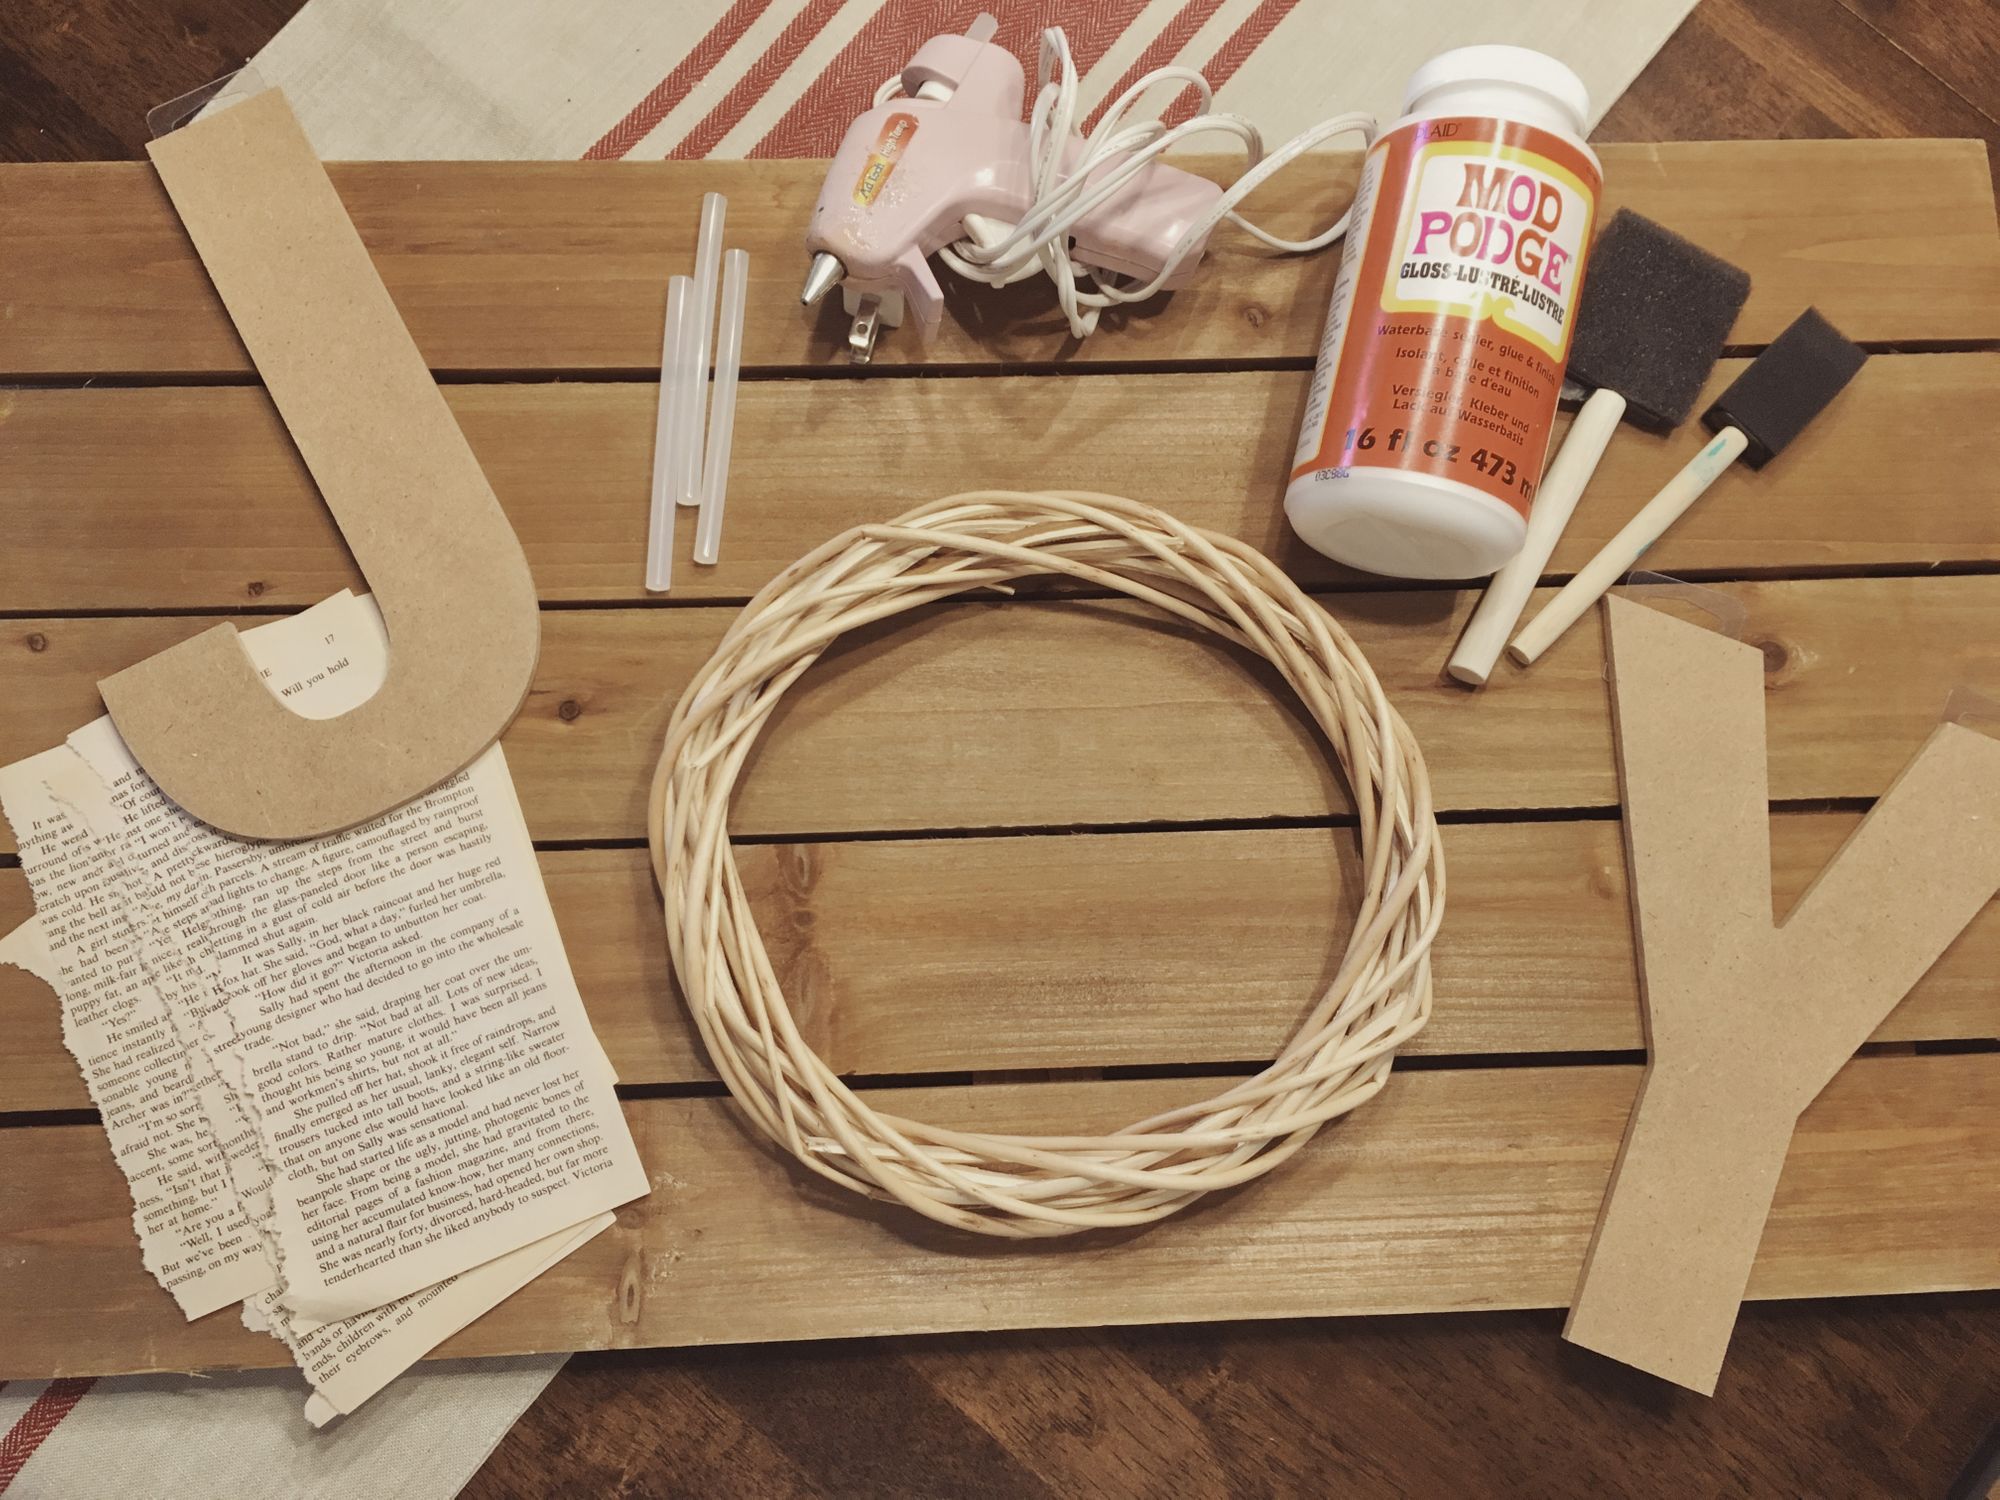
What You'll Need:
- Back Board Or Base. I bought mine off someone selling ones she has bought and never used. And that made this project much faster, but you could also put one together fairly simply.
- A wreath the size of your letters. I found this one at our local dollar store.
- Letters. I found mine at Walmart in the craft section.
- The pages are from a second hand book. I wanted to yellow tinge to the pages, so older is better for this.
- Mod Podge and a dish for it
- Foam Brush
- Glue-gun and sticks
- Paper to cover your work surface
Step One:
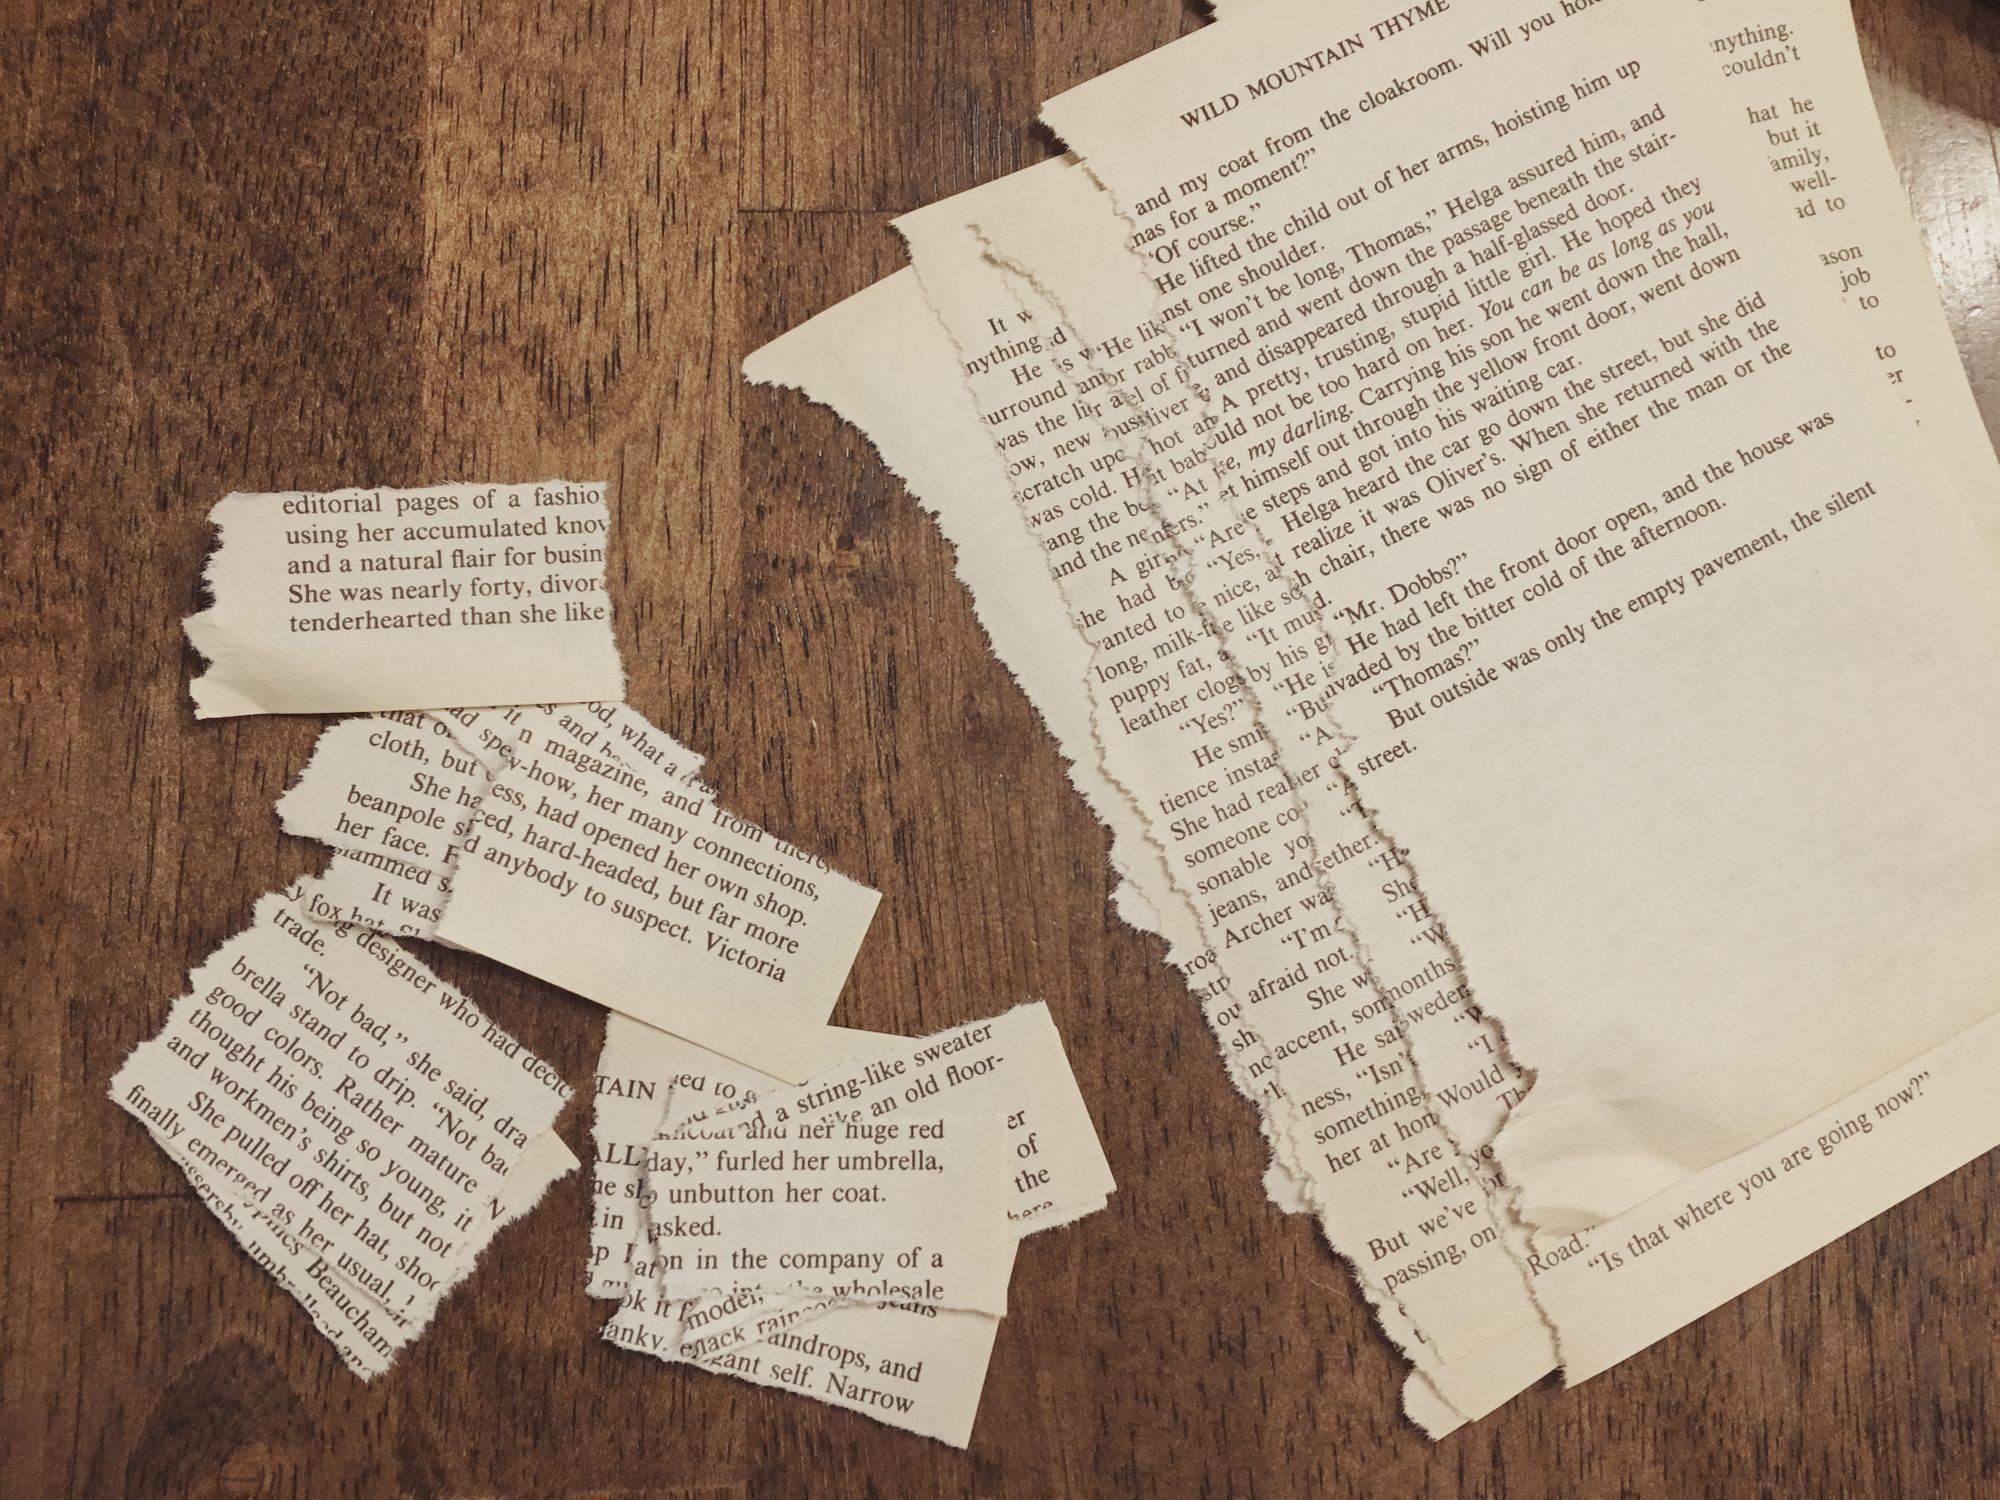
Tear up your book pages into pieces. This was a basic paper back and I just tore across into four strips and then down the middle. No need for perfection here.
Step Two:
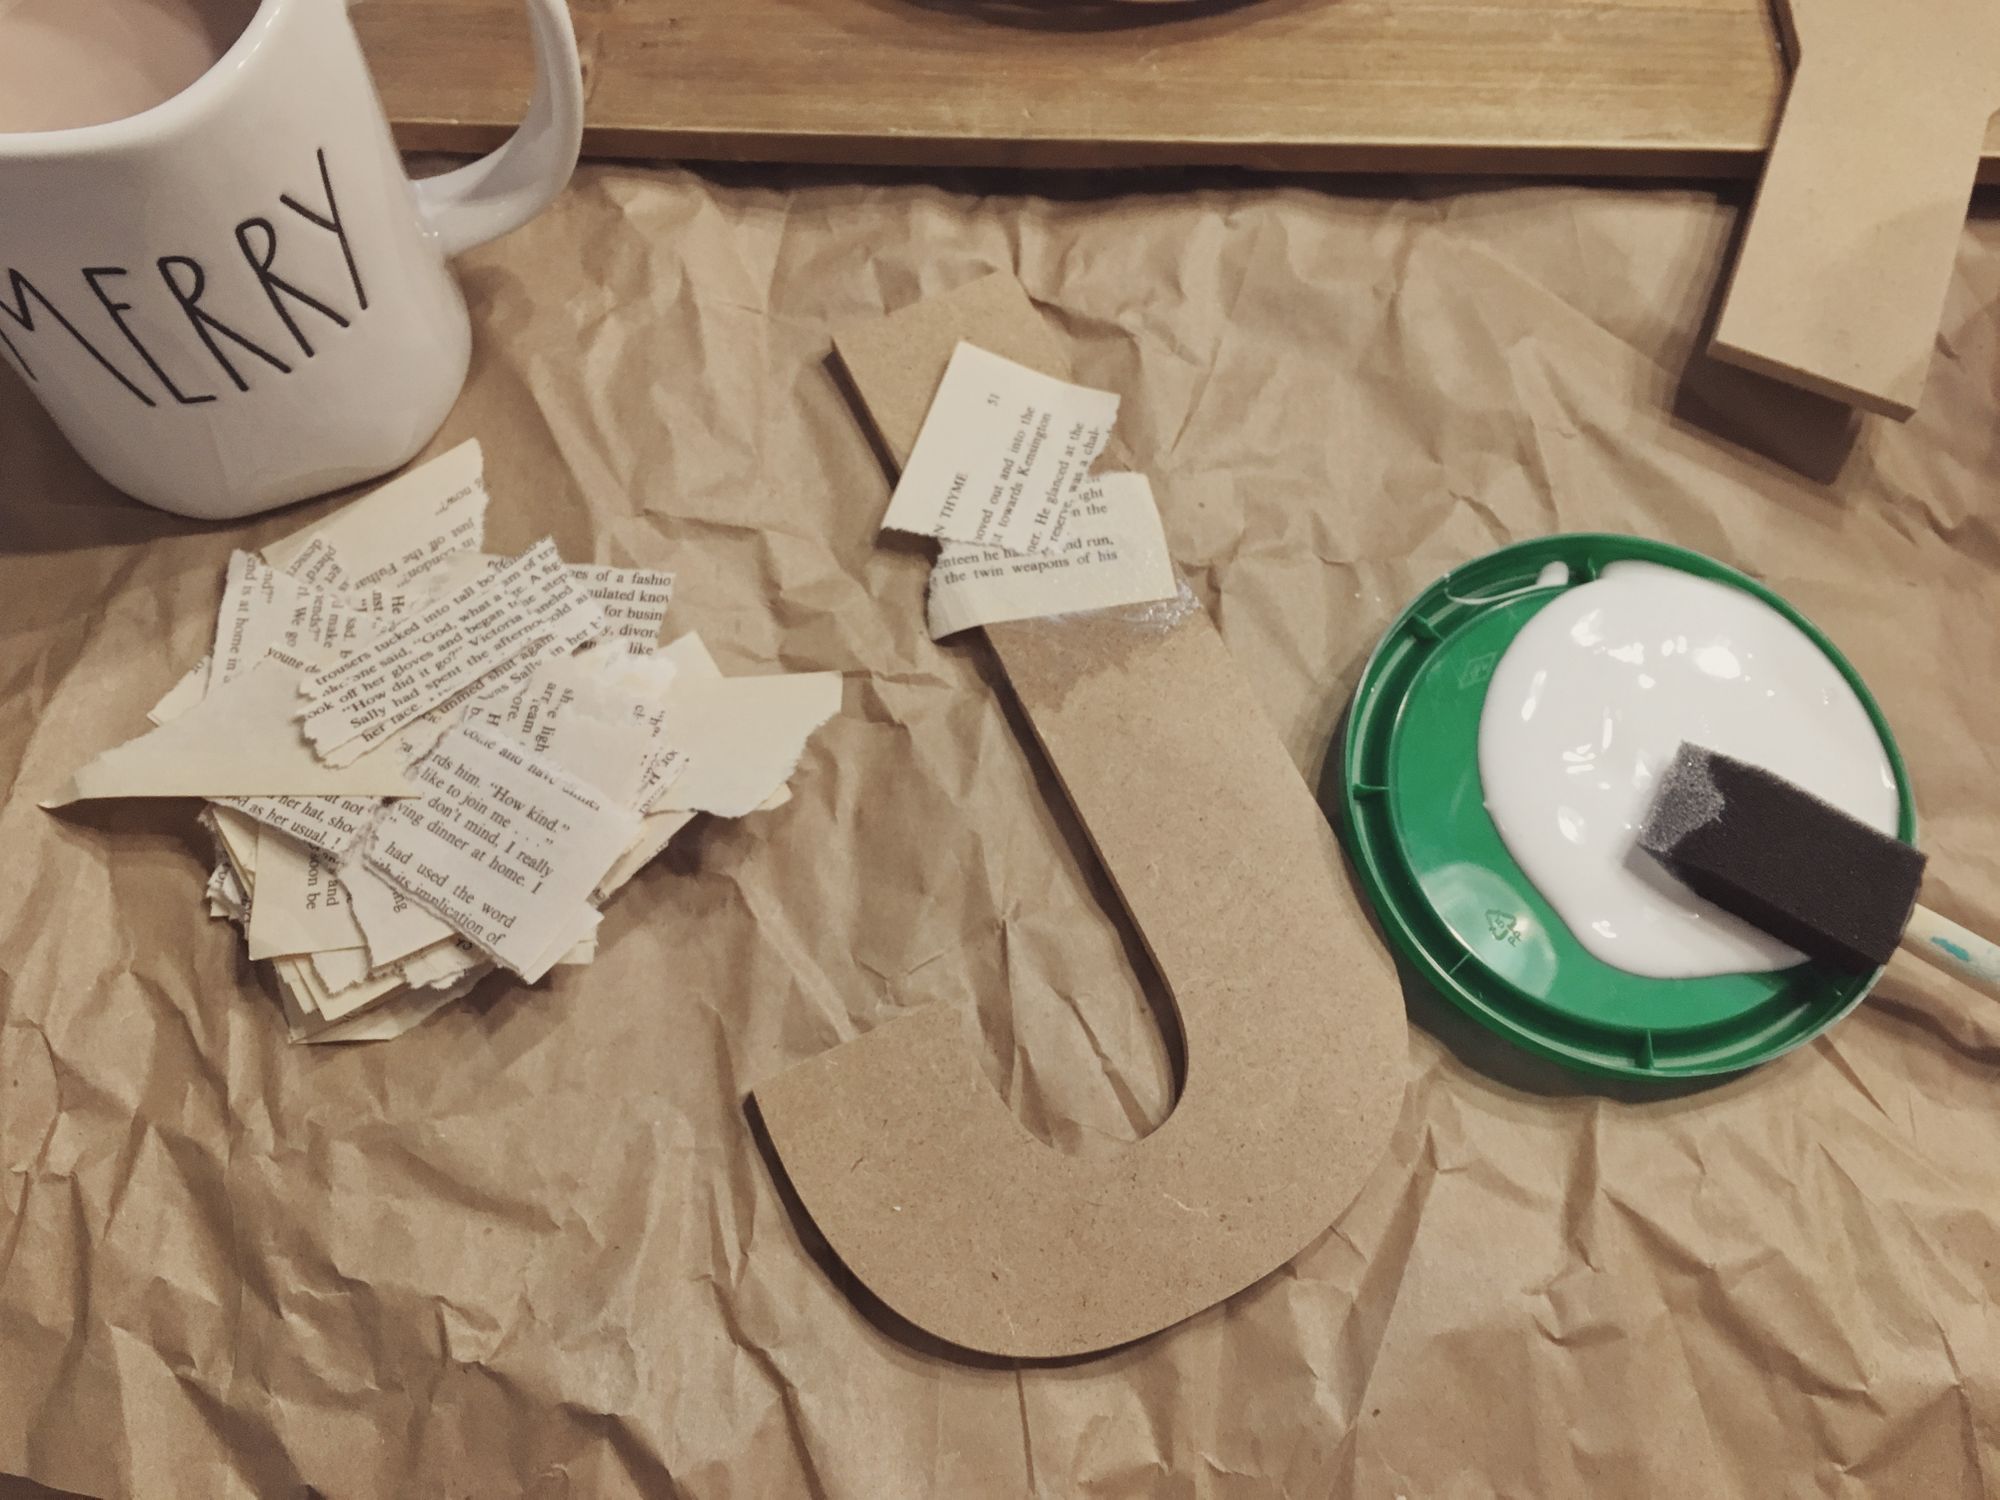
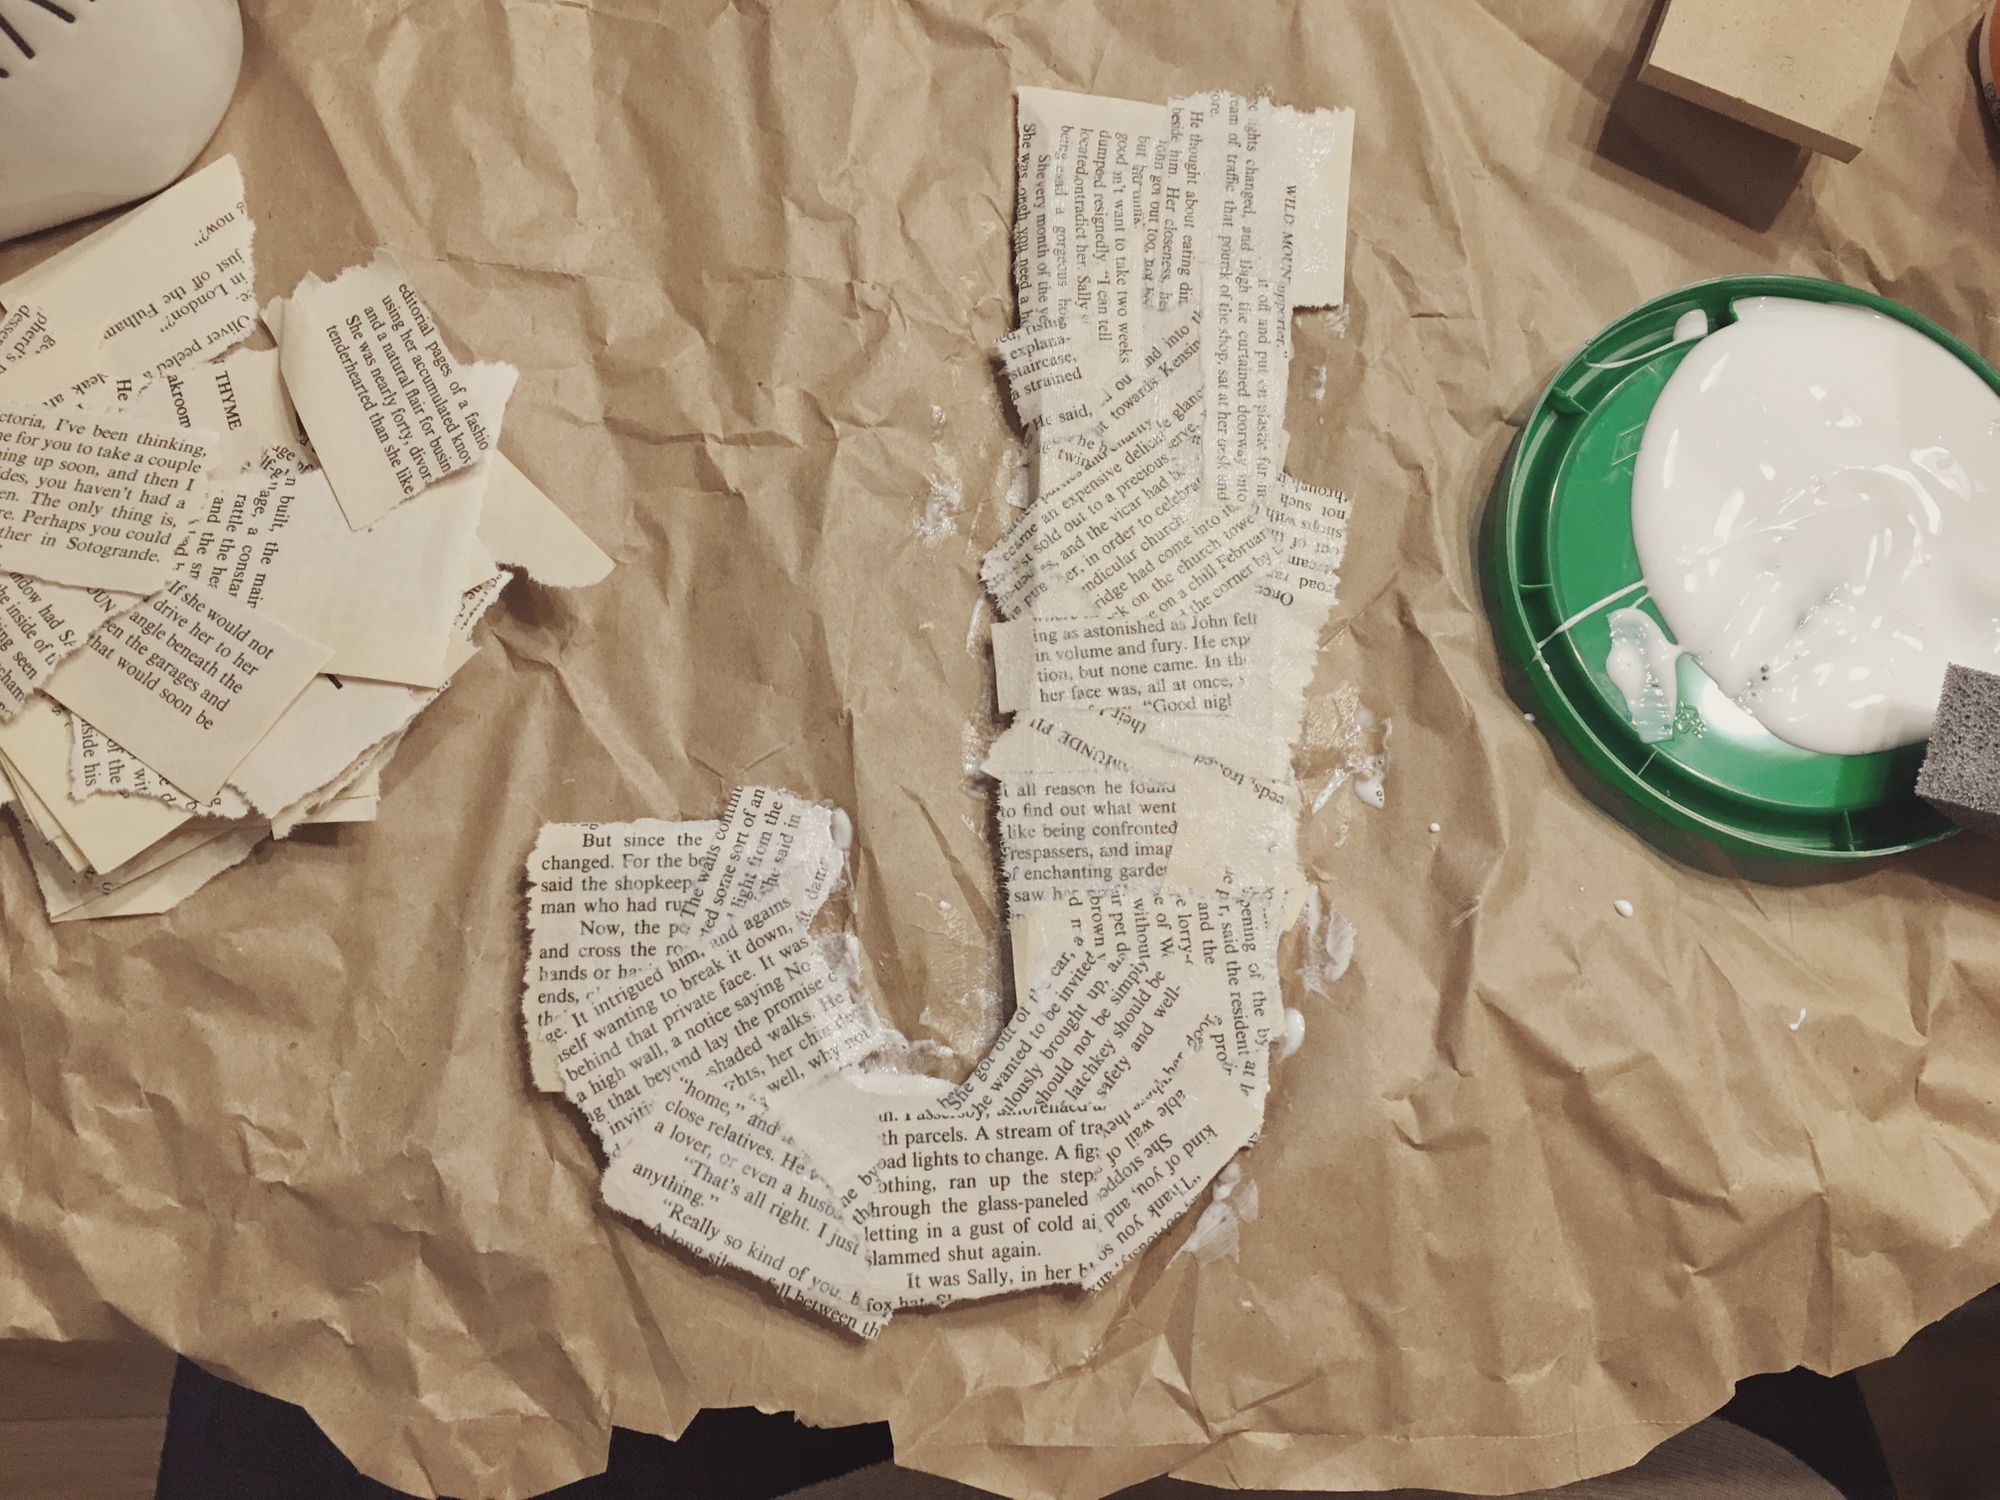
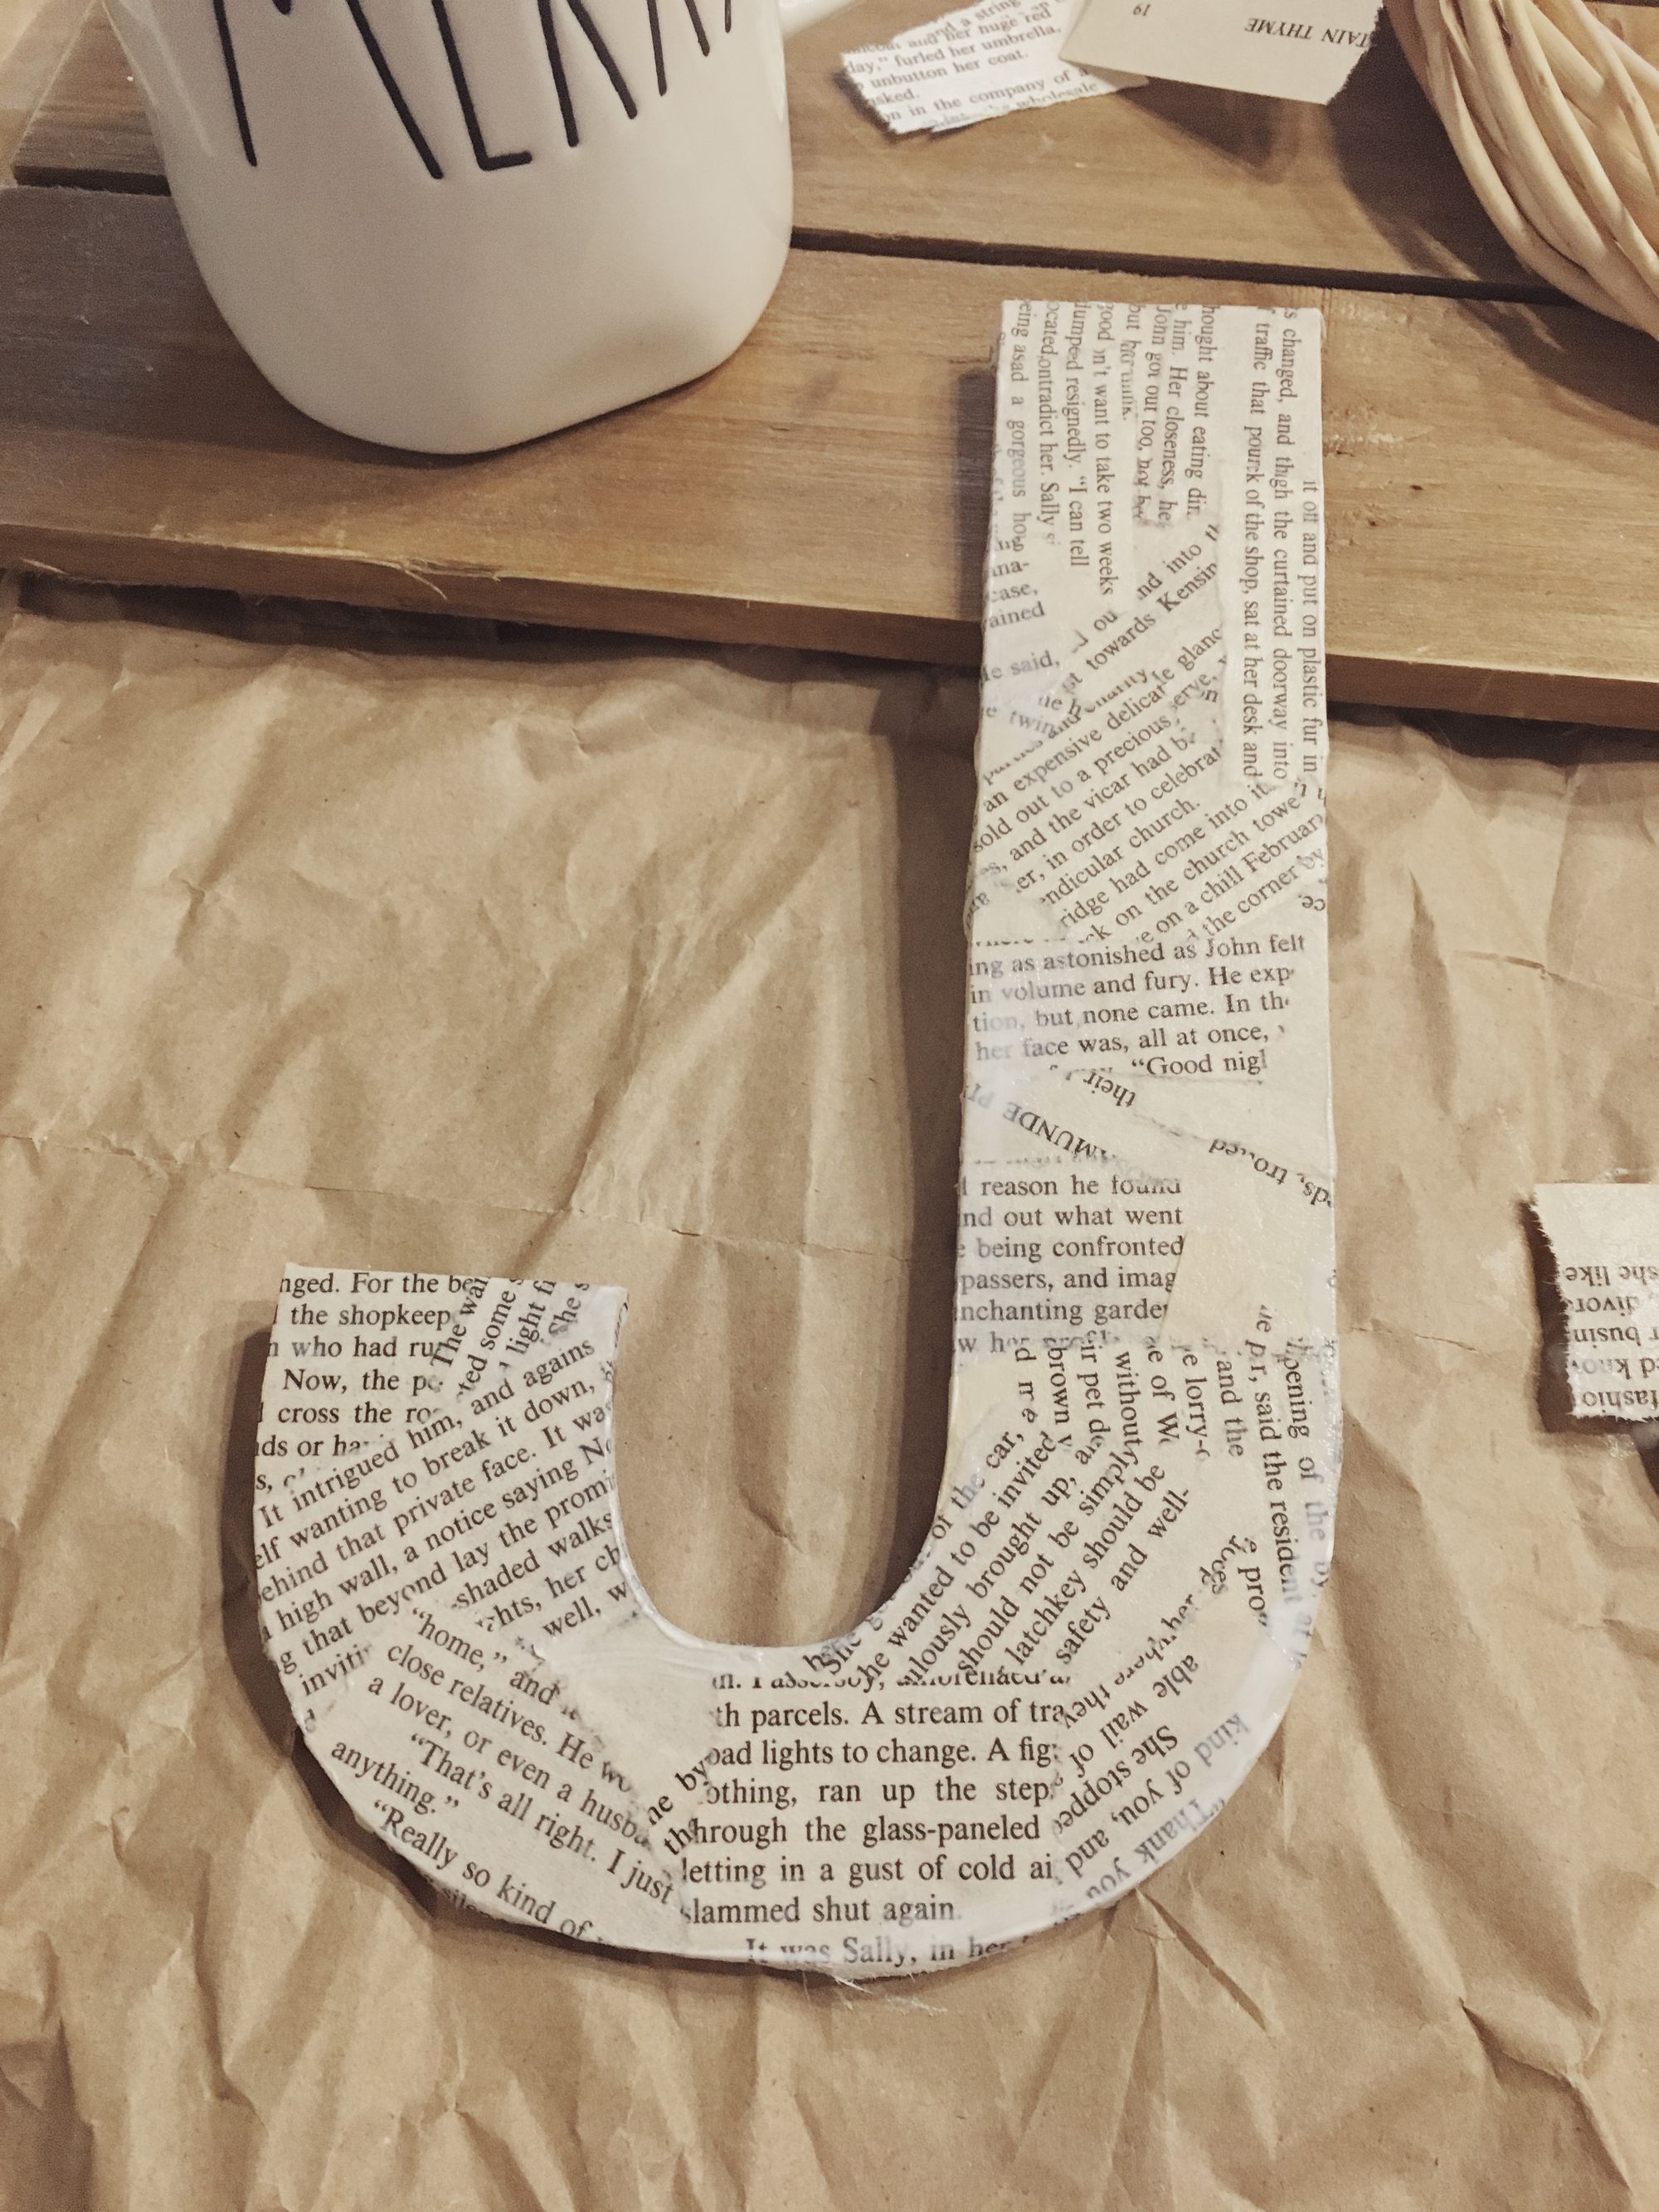
Begin by painting some mod podge onto your letter and begin adding the papers, overlapping the edges. applying a layer of mod podge over each paper as you go. It's ok if the paper goes over the edges of your letter as you can tuck them around it after the face of the letter is covered. Once the front is covered, use more mod podge on the sides and a little around back to get your paper to stick. In the end of this, for "fine tuning" the folds, I used my fingers to help form it around the edges. The brush wasn't doing the trick here. Next you should let the mod podge dry- but i was impatient and just moved on, so it's up to you.
Step Three:


Next find the placement of your letters. Once you are happy with it, lightly pencil a mark at points around the edges of your letters and wreath to help you place the pieces back correctly in the next step.
Step Four:
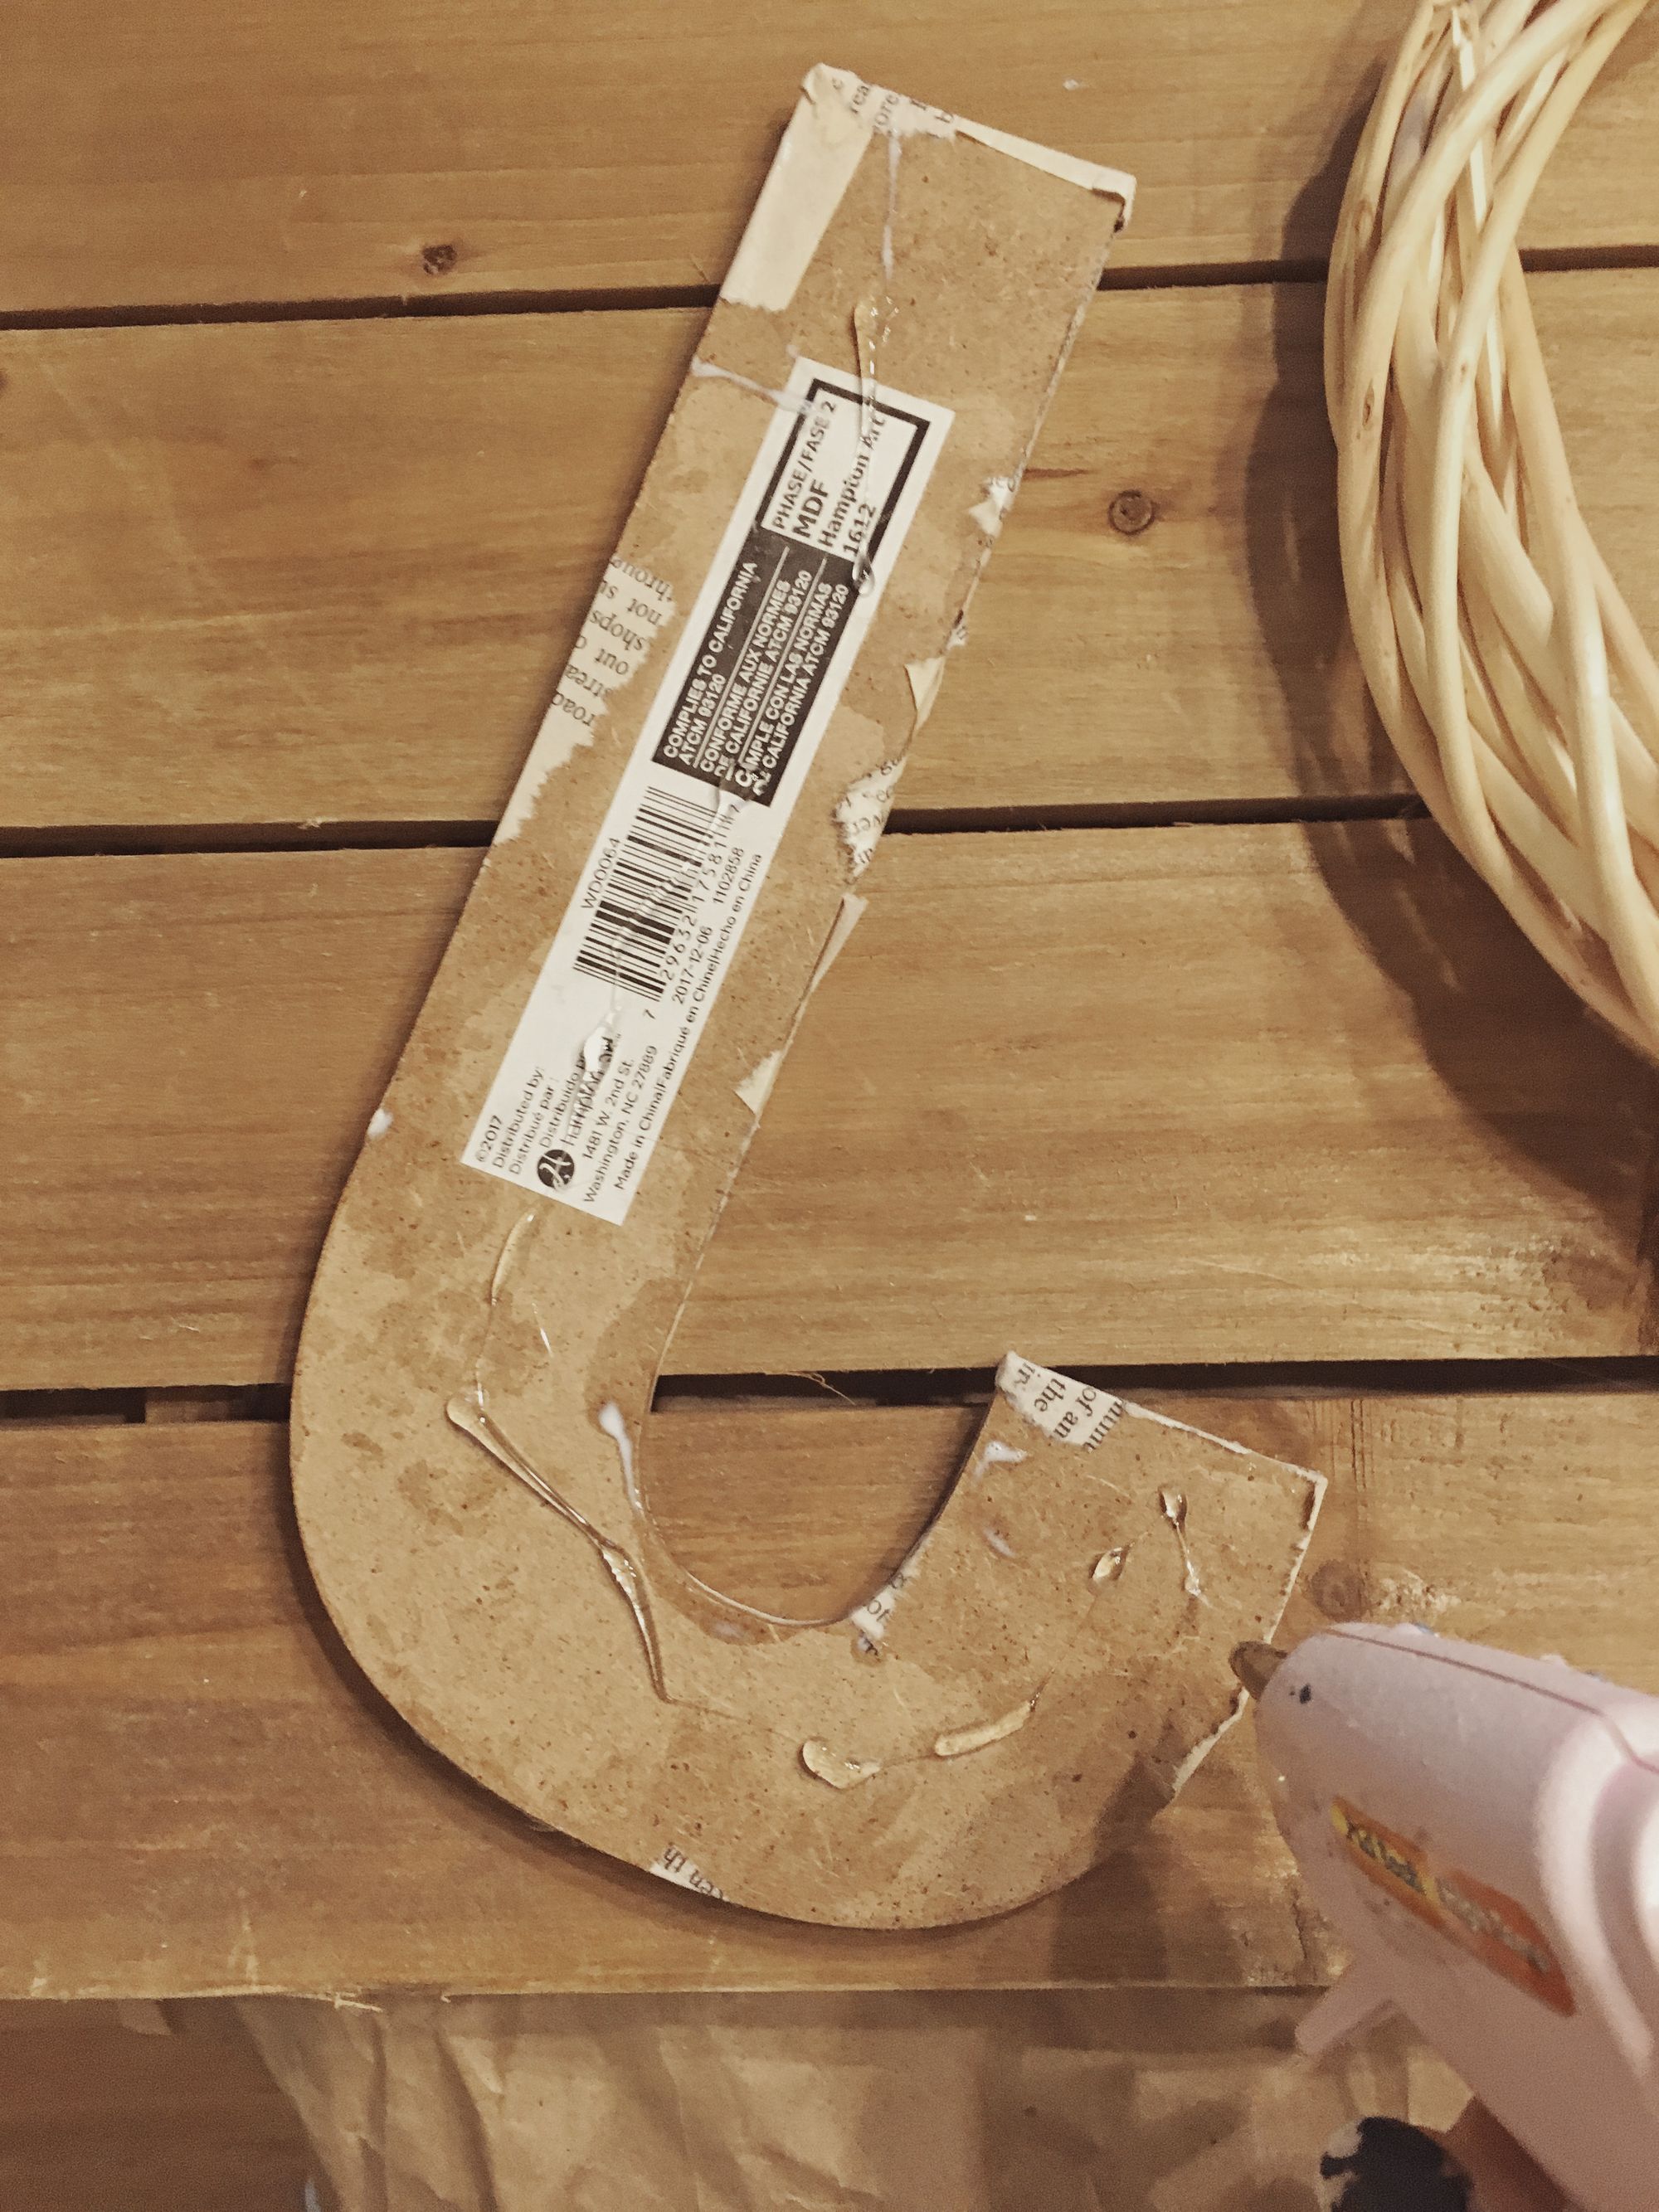
Time for the glue-gun! Just pile as much on as you can quickly and the line up your marks and press down to attach the letters and wreath!
And You are DONE!
See note below.

Note:
- Another idea would be to find some second hand sheet music in you favorite song to tear up and use on the letters.
- Adding some colored ribbon to hang it from, or perhaps thread it through the wreath.
- Stencil snow flakes sporadically, or perhaps stencil hanging ornaments along part of the top.